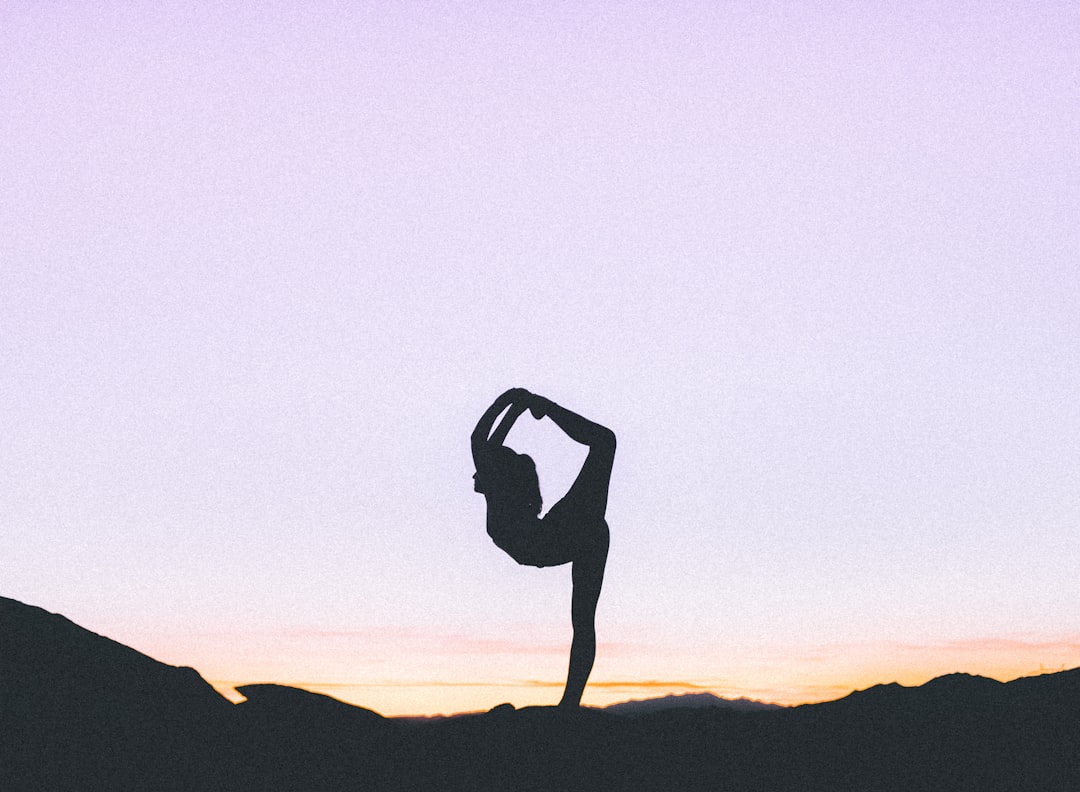
Vinyasa Flow Sequences for Flexibility: Build Mobility in 15–30 Minutes
Three athlete-friendly vinyasa flows to improve hip, hamstring, and shoulder flexibility in 15–30 minutes.
Vinyasa Flow Sequences for Flexibility: Build Mobility in 15–30 Minutes
If you want a vinyasa flow sequence that actually improves flexibility, the key is not just “stretch more.” It’s combining active mobility, controlled breath, and progressive loading so your body learns to own new ranges of motion. This guide gives you three athlete-friendly sequences for hips, hamstrings, and shoulders, plus warm-ups, cooldowns, alignment cues, and smart options for different levels. If you’re looking for a practical beginner yoga routine that still feels structured enough for training days, you’ll find one here. And if you need a safer entry point for tighter bodies, pair this with our guide to pose alignment tips and the basics of how quality content earns trust online—because in yoga, trust comes from clarity, not hype.
Flexibility improves fastest when the nervous system feels safe enough to relax, yet the muscles and connective tissue still receive enough demand to adapt. That’s why a good yoga sequence for flexibility should feel like a conversation: you move, breathe, notice, and adjust. Athletes especially benefit from this approach because it supports recovery without turning every session into passive stretching. If you’re dealing with cranky knees, low backs, or shoulders, the right yoga modifications for injuries can make the difference between productive work and aggravation.
How Vinyasa Improves Flexibility Without Overstretching
Active mobility beats passive hanging
Vinyasa flow works well for flexibility because it repeatedly takes joints through range while the surrounding muscles stay engaged. Instead of sinking into a stretch and hoping for change, you use the breath to create rhythm, then the muscles to create control. That combination tends to be more useful for athletes than long, static holds alone. It’s also easier to scale for yoga poses for beginners who need confidence before intensity.
Think of it like developing a skill in sports practice. A sprinter doesn’t just sit and stretch hamstrings forever; they rehearse mechanics, then gradually load movement patterns. The same idea applies here: your flexibility gains become more durable when you reinforce them through flow. For people comparing different training methods, the progression logic here is similar to the way experts weigh rehab versus performance in Pilates—the best choice depends on the goal, the tissue tolerance, and how much intensity the body can handle.
Breath pacing changes the stretch response
Breath is not a decorative part of yoga; it is part of the training stimulus. Longer exhales can help reduce guarding and let the hips, hamstrings, or shoulders release more smoothly. In practice, this usually means inhaling for expansion and exhaling during the deepest part of the shape. A simple rule: if the breath becomes choppy, you’ve probably asked for too much, too soon.
For many athletes, a steady cadence of four-count inhales and four- or six-count exhales keeps the effort productive without tipping into strain. In a flow setting, that pacing also helps you transition cleanly from pose to pose, which is especially useful when your main priority is mobility rather than cardio. If you’re trying to match breath to movement more intentionally, our overview of yoga breathing exercises can help you build the foundation before you work through these sequences.
What flexible practice should feel like
A good flexibility session should feel like “pleasant effort,” not sharp pain, numbness, or pinching. You may feel heat, muscular engagement, and a sense of stretch; you should not feel joint compression or a tugging sensation that makes you brace. The difference matters, because flexibility that comes from brute force often disappears as soon as the body cools down, while flexibility built through control tends to stick. That’s one reason seasoned coaches often emphasize progression over intensity, similar to the careful sequencing seen in community-driven learning: each step prepares the next.
As you read the sequences below, remember that yoga pose names are tools, not tests. You do not need to “win” a pose; you need to organize your body well enough that the pose can serve your goal. For athletes, that means leaving each session feeling looser, not trashed. If you want a broader reference for exercise structure and pacing, the sequencing mindset in curating cohesive programs is surprisingly similar to good yoga design.
How to Use These 15–30 Minute Sequences
Choose the right sequence for the day
These three flows are designed to target different restrictions: hips, hamstrings, and shoulders. If you’ve got a lower-body training day coming up, the hip sequence is ideal as a warm-up or post-workout reset. If you’ve been running, cycling, or lifting deadlifts, the hamstring sequence helps restore length without losing spinal organization. If your sport is overhead-dominant—swimming, basketball, volleyball, climbing—the shoulder sequence is your best bet.
If you only have 15 minutes, do the warm-up, one main sequence, and a short cooldown. If you have 30 minutes, repeat the middle section of the flow or add longer hold-and-breathe intervals. For people who travel a lot or squeeze practice between commitments, the planning logic here is similar to packing efficiently for travel: select the essentials, avoid waste, and keep the session portable.
Use the table below to match your goal
| Goal | Best sequence | Primary benefits | Recommended hold/breath style | Best for |
|---|---|---|---|---|
| Hip mobility | Sequence 1 | Open hip flexors, glutes, adductors | 3–5 breaths per pose | Runners, lifters, desk workers |
| Hamstring length | Sequence 2 | Lengthen posterior chain, improve hinge mechanics | 2–4 breaths per transition, 4–6 breaths in key stretches | Sprinters, cyclists, deadlifters |
| Shoulder freedom | Sequence 3 | Improve overhead range, scapular control, chest opening | Slow transitions, 3–5 breaths in opening shapes | Swimmers, climbers, throwers |
| Recovery day | Any sequence + cooldown | Downshift nervous system, reduce stiffness | Long exhales, easy pace | After hard training or competition |
| Beginner entry point | Shortened versions with props | Build confidence and control | One breath per movement | New yogis, returning movers |
Warm-up and cooldown matter more than people think
Flexibility work goes better when the tissues are warm, the joints are lubricated, and the body has some baseline circulation. A few rounds of cat-cow, marching in place, arm circles, and gentle lunges can dramatically improve how a flow feels. After the main sequence, a cooldown helps transition from active mobility to parasympathetic recovery, which is especially useful after sport. For a bigger-picture approach to recovery, you may also like our guide on choosing the right home practice essentials and setting up a low-friction routine.
Sequence 1: Hip-Focused Vinyasa Flow for Deep Mobility
Warm-up: wake up the pelvis and spine
Start with 5 to 7 rounds of cat-cow, then move into downward dog and a few slow pedal-backs to stretch the calves and hamstrings lightly. Step to a low lunge on the right side, then the left, keeping the back knee down if your hips feel tight. From there, add a gentle crescent lunge pulse with arms overhead to open the hip flexors without collapsing into the low back. This warm-up is also a good place to assess asymmetry before you load the sequence.
Key cue: keep the pelvis level and avoid dumping all your weight into the front leg. If your low back arches aggressively in low lunge, shorten the stance and tuck the ribs gently in. If needed, place blocks under your hands to reduce strain and create more room for the hip to move. For more support options, our overview of yoga modifications for injuries offers a practical way to adapt demanding positions.
Main flow: lunge, squat, and rotational opening
Move from low lunge into half split, then return to lunge and step to goddess pose with feet wide and toes turned slightly out. Add lateral shifts in goddess to open adductors, then transition to skandasana or a side lunge if your hips tolerate it. Repeat on both sides, keeping the breath smooth and the torso tall. This sequence does not need dramatic depth; the goal is to build usable range around the hips, not collapse into them.
Alignment tips: in goddess, track knees over toes and avoid letting arches cave in. In low lunge, think of reaching the tailbone toward the back heel rather than arching the lumbar spine. When moving into half split, hinge from the hips and keep the spine long instead of rounding aggressively. These details are the equivalent of sound pose alignment tips: small corrections create a much better outcome.
Peak poses and breath pacing
After 3 to 5 rounds of the flow, hold lizard lunge for 3 to 5 breaths on each side if your knees and wrists are comfortable. You can stay on forearms for a deeper hip opener, but only if the lumbar spine remains neutral and the front knee does not twist inward. If the stretch becomes too intense, elevate the hands on blocks or keep the back knee down. The safest flexibility gains come from staying right below the point where the body starts to brace.
Breath pacing for this sequence should feel like: inhale to lengthen the spine, exhale to deepen 5 to 10 percent, inhale to soften the face and jaw. That pattern gives the nervous system a clear signal that the work is controlled, not threatening. Athletes who rush through hip opening often lose the benefit because they never let the tissue adapt. A slower rhythm is often the smarter way to progress, much like the caution seen in risk-aware decision-making when a system is under pressure.
Sequence 2: Hamstring-Focused Vinyasa Flow for Length and Hinge Control
Warm-up: activate, then lengthen
Before chasing hamstring flexibility, wake up the glutes and core. Start in mountain pose, hinge into a soft standing forward fold, then roll up slowly for several reps. Add a few alternating knee lifts and a gentle downward dog to prepare the posterior chain. Then step into a half split with the front foot flexed, keeping the hips square as you shift weight back.
This order matters because tight hamstrings often protect a weak or underused hip hinge. If you stretch them without organizing the pelvis and trunk, you can create more tension later. The same principle of sequencing for durability appears in data-to-action frameworks: you need a clean input before you can expect a stable output.
Main flow: fold, lunge, and hinge
From downward dog, step to a runner’s lunge, then transition to half split, high lunge, and a standing pyramid pose. Repeat both sides in a slow vinyasa pattern, using the exhale to enter the fold and the inhale to lengthen the spine. If your back rounds immediately in pyramid, reduce the stance length and bend the front knee. This sequence should build control in the hinge pattern, not force your torso toward your shin.
Important alignment cue: keep the front hip from drifting open in pyramid. Square the pelvis as much as your anatomy allows, and imagine both hip points aiming toward the front of the mat. Keep a micro-bend in the knee if the hamstring attachment feels tuggy behind the knee, especially if you’ve recently sprinted, deadlifted, or sat for long periods. These are the kinds of practical adjustments that make a yoga poses names list actually useful in real life.
Peak stretch and safe exit
The strongest hamstring opener in this sequence is standing half split or pyramid with blocks under the hands. Hold for 4 to 6 breaths while actively drawing the thigh muscles back and the kneecap up. That active engagement protects the joint and helps the nervous system accept the stretch. If you want a seated option, a gentle reclining hamstring stretch with a strap works well after the flow, especially for tight athletes.
Do not yank the foot or lock the knee. Those habits can irritate the tendon behind the knee and make the area feel tighter later. Instead, exhale into the back of the leg while keeping the front of the thigh awake. This is where flexibility becomes more than range; it becomes strength in range, which is the real athletic payoff.
Sequence 3: Shoulder-Focused Vinyasa Flow for Overhead Mobility
Warm-up: open the upper back first
Shoulder flexibility improves faster when the thoracic spine is mobile and the scapulae can glide. Begin with cat-cow, thread-the-needle on both sides, and a few rounds of puppy pose with the elbows lifted or forearms grounded. Then add arm circles and gentle cactus arms to wake up the chest and rotator cuff. If the shoulders are very tight, keep the neck long and avoid forcing the chest toward the floor.
Many athletes mistake shoulder flexibility for pure joint opening, but the upper back plays a major role. If the thoracic spine is stiff, the shoulders often compensate and the neck takes over. For this reason, a thoughtful warm-up is often more effective than jumping straight into big openings, much like bite-size teaching formats work better when the audience needs clarity first.
Main flow: plank, cobra, dolphin, and puppy
Flow from high plank to lower plank or cobra, then press back to downward dog and step the feet forward into a standing forward fold. Repeat this with a deliberate scapular rhythm: in plank, push the floor away; in cobra, broaden the collarbones; in downward dog, rotate the upper arms outward without shrugging. Then add dolphin pose or puppy pose for a more intense shoulder and lat opening. Use 2 to 4 rounds if you’re new to the shapes, or 5 to 6 rounds if you need a longer mobility dose.
Alignment matters a lot in the shoulders because poor positioning can create pinching fast. Keep the elbows from flaring wildly in plank, and avoid collapsing the chest between the arms in puppy. If a full down dog feels excessive, shorten the stance and keep the knees bent. This is where the practice resembles smart product testing: a useful adjustment is not failure, it is evidence-based refinement, similar to the logic in practical performance troubleshooting.
Peak mobility without joint irritation
Hold puppy pose or extended puppy for 3 to 5 breaths, then rest in child’s pose or neutral tabletop. If you work overhead in sport, you may also add eagle arms or a strap-assisted shoulder stretch after the flow. The goal is to open the front line of the body while preserving control through the shoulder blades. A flexible shoulder that is also stable is far more useful than a loose shoulder that feels vague.
If you’ve had prior shoulder irritation, keep the range smaller and use wall support. For more conservative practice ideas, review our notes on when to slow down versus progress so you can adapt based on the day’s tolerance. A smart modification is not “less yoga”; it is the right yoga for the current tissue state.
Detailed Alignment Tips for Safer Flexibility Gains
Protect the joints, not just the muscles
When people chase flexibility, they often forget that joints have limits even when muscles feel willing. If the hip pinches in deep rotation, the issue may not be “tightness” at all; it may be bone shape or an angle that needs to be reduced. Similar caution applies to hamstrings behind the knee and shoulders near the front of the joint. The safest way to practice is to treat discomfort as information, not a challenge to overcome.
In a flexible body, the skill is not going deeper every time. The skill is knowing when to back off, when to stabilize, and when to breathe into the shape a little longer. That is why yoga instructors often prioritize structure over spectacle. If you’re looking for a broader framework for learning safely, our guide on community learning tactics translates well: people improve faster when the environment supports experimentation without pressure.
Use props as performance tools
Blocks, straps, a wall, and folded blankets are not beginner crutches; they are precision tools. Blocks in pyramid can keep the spine long. A strap in hamstring work can help you maintain neutral pelvis positioning. A wall in shoulder work can teach better arm tracking. These props reduce compensation and make the flow more repeatable from session to session.
That repeatability matters because flexibility gains often come from consistency more than heroic intensity. For athletes, the best session is the one you can perform again two days later without flare-ups. If you travel frequently or train in different settings, it helps to keep your gear organized and simple, much like choosing the right gym bag essentials for a busy schedule.
Watch for common compensation patterns
In hip work, compensation often shows up as a backbend in the low back instead of actual opening in the front of the hip. In hamstring work, it often shows up as rounding the spine and yanking the torso downward. In shoulder work, it may appear as shrugged ears, unstable elbows, or rib flare. If you see any of those patterns, shorten the range and reset.
One useful mental cue is to think “long spine, broad collarbones, quiet jaw.” That simple phrase helps many people reduce unnecessary tension. It’s especially helpful in a flow where transitions happen quickly and you can lose body awareness between shapes. In a way, this is the same challenge as managing complex systems: clarity and restraint usually outperform chaos, a point echoed in well-designed flow systems.
Suggested 15-, 20-, and 30-Minute Formats
15-minute flexibility reset
Use the 15-minute version when you need a quick pre-workout primer or post-practice reset. Spend 4 minutes warming up, 8 minutes on one target sequence, and 3 minutes cooling down. Keep transitions slow but efficient, and choose only one peak stretch per side. This format is enough to maintain mobility and remind the body of better movement paths.
For example, a runner might do the hip sequence before easy miles, while a climber may use the shoulder sequence after a session to reduce upper-body stiffness. Keep expectations realistic: a 15-minute session won’t transform range overnight, but it can absolutely improve consistency and how your body feels during the day.
20-minute balanced session
The 20-minute version works well for most athletes because it leaves room for a real warm-up, the main sequence, and a short cooldown. You can also split it into two mini-rounds: 10 minutes before training and 10 minutes after. This approach often feels better than one longer stretch session because the body receives repeated mobility signals throughout the day. It’s also easier to stick with when your schedule is crowded.
If you’re building a routine from scratch, combine this with the logic in our guide to yoga poses for beginners so you can scale the practice to your current level. The smartest plans are the ones that fit your actual life, not your idealized one.
30-minute deep-dive session
The 30-minute version lets you move through two target areas or spend longer in the peak shapes. For example, you might do hips first, then a short shoulder-finisher, or hamstrings followed by extra core support. Add longer holds, more breath counts, and slower exits. This is the best choice on recovery days when you want to leave the mat feeling both open and organized.
To keep the session honest, note where you feel the most restriction and track how that changes over a few weeks. Flexibility progress is often gradual, and the best results come from repeatable practice, not random intensity. If you want a broader example of how structured routines can improve consistency, the planning logic in well-run experience design offers a useful comparison: the details matter.
Who Should Modify, and How
Low back sensitivity
If your low back is sensitive, reduce the depth of backbends and keep your core lightly engaged during lunges and cobras. Avoid aggressively tucking or dumping the pelvis; instead, look for neutral alignment and smaller ranges. Shorter stances can also reduce lumbar compression in hip openers. In many cases, less range with better control is the more therapeutic option.
Use blocks frequently and skip any pose that causes sharp pain or lingering discomfort later in the day. If you need a framework for adjusting intensity, the same kind of decision-making used in rehab-oriented movement progressions applies well here.
Shoulder irritation or impingement history
Keep the elbows slightly bent in down dog if straight arms feel pinchy. In plank, think of pushing the floor away rather than sinking down. In puppy pose, stop well before the shoulder joint feels compressed. A wall-based version often works better than floor-based extremes, especially if overhead positions are the source of symptoms.
Also remember that shoulder mobility is not only about stretching the front of the shoulder. Strengthening the upper back and rotating the rib cage can make the opening feel easier. That balanced approach keeps the work functional rather than forced.
Tight hamstrings or previous strain
Never push aggressively into straight-leg stretching right after a strain. Use bent-knee options, very gentle dynamic movement, and shorter holds until the tissue is calm. You should be able to breathe evenly through the stretch and walk away without feeling a re-grip later. When in doubt, prioritize light movement and gradual exposure.
If you’re trying to keep routine stable while protecting recovery, think of your mat setup the way smart shoppers think about durable gear: simple, reliable, and easy to repeat. That mindset is similar to the practical standards in fitness bag planning—what matters is whether the system supports your life consistently.
FAQ: Vinyasa Flow Sequences for Flexibility
How often should I do a flexibility-focused vinyasa flow?
For most people, 3 to 5 sessions per week works well, especially if each one is short and targeted. Athletes often benefit from using a 15-minute sequence on training days and a 20–30 minute version on recovery days. The most important factor is consistency, because flexible tissues adapt gradually to repeated, manageable input.
Should flexibility work come before or after workouts?
Dynamic mobility and light vinyasa are usually excellent before training, while longer holds and slower breathing are often better after workouts. If your sport requires explosive output, avoid long passive stretching immediately before performance. For recovery, a calm, slower-paced sequence can help the body downshift.
What if I’m a beginner and can’t do the full poses?
That is completely normal. Use blocks, straps, bent knees, shorter stances, and wall support to make the shapes accessible. The goal is not to hit the “full” version right away; it’s to learn the movement pattern safely and build tolerance over time. Beginner-friendly options are often the fastest path to real progress.
How do I know if I’m stretching too hard?
Back off if you feel sharp pain, pinching, numbness, joint discomfort, or if your breath becomes strained and uneven. A good stretch usually feels like muscular tension, warmth, or a manageable edge—not a fight. If the sensation lingers uncomfortably after practice, the intensity was likely too high.
Can these sequences help with sports performance?
Yes, especially when flexibility limitations are affecting mechanics. Better hip mobility can improve stride or squat depth, hamstring length can support hinge patterns, and shoulder freedom can help overhead movement. The best results happen when flexibility is combined with stability and repeated practice, not used as a one-time fix.
Final Takeaway: Make Flexibility a Skill, Not a Guess
A good vinyasa flow sequence for flexibility should do more than make you feel stretched for a moment. It should help you move better, breathe better, and recover with less stiffness after sport. That means choosing the right sequence for the body part you want to improve, warming up intelligently, pacing your breath, and using props or modifications when needed. If you keep the practice repeatable, you will almost always get better results than chasing intensity.
Start with the sequence that matches your biggest restriction, run it for two weeks, and note how your movement changes in training and daily life. If your hips loosen, your hinge improves; if your hamstrings open, forward folds become less draining; if your shoulders free up, overhead work feels smoother. For more ways to build a trustworthy, sustainable practice, browse our deeper guides on alignment, modifications, and beginner-friendly sequencing. The best flexibility program is the one you can do again next week, with control, curiosity, and confidence.
Related Reading
- Rehab vs. Performance: When Pilates Should Slow Down and When It Should Progress - Helpful for deciding how hard to push mobility work.
- First Flight Together: Planning Family-Friendly Flying Experiences and Intro Lessons Near You - Useful for beginner-friendly progression thinking.
- CBT Worksheets You Can Use Today: Practical Templates and How to Fill Them - A clear model for structured self-check-ins.
- Creating Community-Driven Learning: Engagement Tactics for Educators - Great for understanding consistency and accountability.
- Rent the Runway, But Make It Peer-to-Peer: How Pickle Helps You Try Trends Risk-Free - A practical lens for trying new yoga modifications safely.
Related Topics
Daniel Mercer
Senior Yoga & Wellness Editor
Senior editor and content strategist. Writing about technology, design, and the future of digital media. Follow along for deep dives into the industry's moving parts.
Up Next
More stories handpicked for you
10 Restorative Yoga Poses to Speed Recovery After Intense Training

Exploring Yoga's Role in Healing for Post-Athletic Recovery

Genetics, Adaptogens and Yoga: Personalizing Practice for Athletic Edge

15-Minute Researcher Reset: Yoga Practices to Boost Focus During Graduate Student Crunch Weeks
Weight Management for Athletes: How Yoga Can Help With Healthy Cutting
From Our Network
Trending stories across our publication group

Mindful Metrics: What Revenue Managers Can Learn from Yoga About Focus Under Pressure

From Shift Work to Stretch Work: Yoga Routines for Hospitality Professionals on Late Schedules

Future-Proofing Your Yoga Studio: Essential Tech for Hybrid Classes

Chair Yoga for Seniors: Safe, Seated Sequences for Mobility and Balance

Yoga for Back Pain: Gentle Poses and Daily Routines That Help
